© 2017 - 2020 Tech SNA • All Rights Reserved •
What is The WordPress .htaccess file?
.htaccess is a configuration file for use on web servers running the Apache Web Server software. When a .htaccess file is placed in a directory which is in turn ‘loaded via the Apache Web Server’, then the .htaccess file is detected and executed by the Apache Web Server software
The default Code for Your WordPress .htaccess file
# BEGIN WordPress
RewriteRule ^index\.php$ – [L]
RewriteCond %{REQUEST_FILENAME} !-f
RewriteCond %{REQUEST_FILENAME} !-d
RewriteRule . /index.php [L]
# END WordPress
How to Edit .htaccess File Using Yoast SEO Plugin
1/- Log into your WordPress Dashboard.
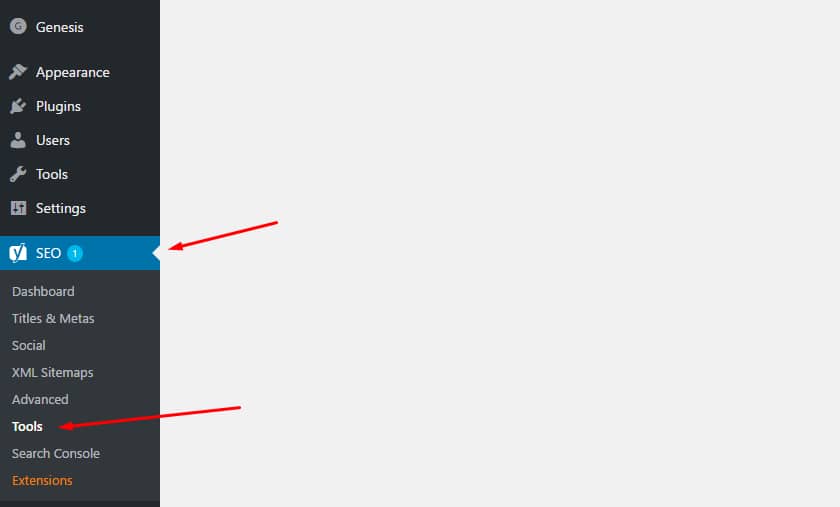
2/- Click SEO then Tools in the navigation menu.
Must Read: Top 5 Fastest and Best Internet Browsers
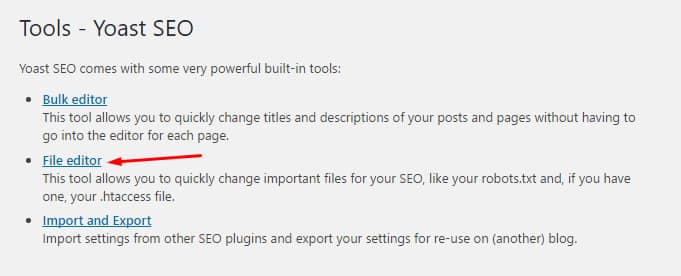
3/- You will then be on the Yoast SEO Tools page, click the File editor link.
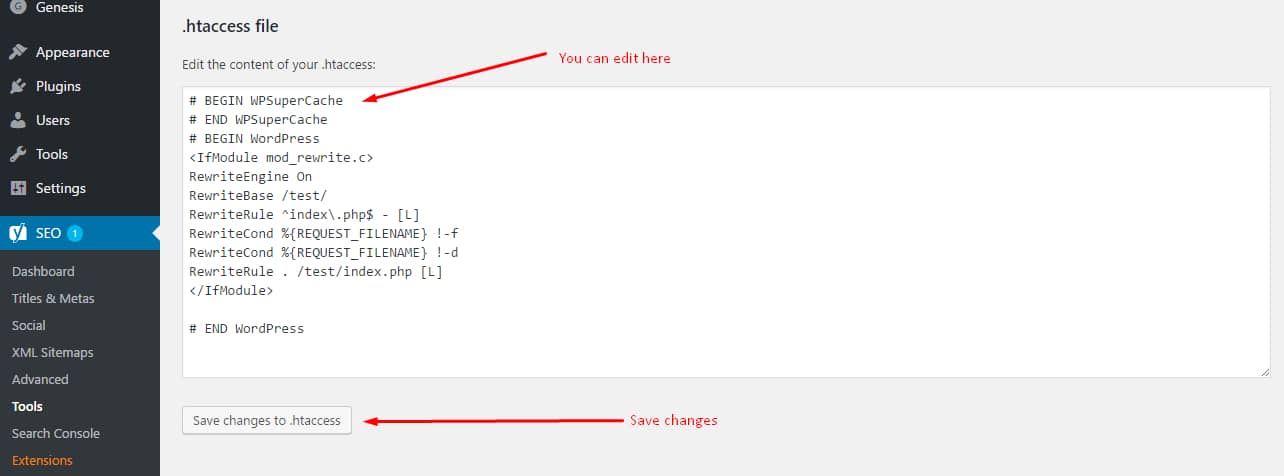
4/- Edit .htaccess and Save changes.
Be careful: One Mistake and Your Site Will Disappear
Any single mistake in .htaccess file results in the webserver returns a blank page or error 500. So some precautions should be taken while updating the .htaccess file. always make a backup or download the current .htaccess file. you can save the backup on your desktop so that if anything goes wrong, it will be easy to restore the backup file. after a successful edit, do check your website in a different browser. Clear browser history, this reduces the risk of picking up a cached page. don’t use Yoast SEO for having significant changes in .htaccess because if you broke up with your site, you can’t restore the backup using Yoast SEO plugin.